Difference between revisions of "TOA"
Jump to navigation
Jump to search
(youtube link) |
(terminology edits) |
||
| Line 3: | Line 3: | ||
# Remove the TOA amp/powered mixer, it is heavy so you may want to use a cart. | # Remove the TOA amp/powered mixer, it is heavy so you may want to use a cart. | ||
# Set it on the table outside the storage unit or leave it on the cart, move it to the stage front near the speakers. | # Set it on the table outside the storage unit or leave it on the cart, move it to the stage front near the speakers. | ||
# Make sure the unit is off | # Make sure the unit is off - #8 Power Switch (below) | ||
# Plug in the unit. | # Plug in the unit. | ||
# Connect the speaker | # Connect the speaker cables to the back of the unit - #6 Speaker Plugs (below). Use either port on the speakers. Speakers are usually on the stage. Speaker cables are in the storage lockup. | ||
# Make sure that all of the white knobs and the | # Make sure that all of the white knobs (TRIM & INPUT LEVEL) and the MASTER are turned down/ fully counter clockwise. | ||
# Turn the unit on, power switch on the back of the unit. | # Turn the unit on, power switch on the back of the unit. | ||
# If using microphones connect them to inputs 2 or 3. | # If using microphones connect them to inputs 2 or 3. | ||
# After connecting a microphone adjust the appropriate | # After connecting a microphone, speak loudly into it & adjust the appropriate TRIM knob (top row of white knobs) clockwise slowly unit the red indicator light flashes (just above the knob), then turn the knob back just a little. | ||
# Adjust the appropriate | # Adjust the appropriate INPUT LEVEL knob (bottom row of knobs) clockwise about half way up. | ||
# Adjust the | # Adjust the MASTER control knob (lower middle with white tape "Master" written on it, clockwise about half way. | ||
# Turn microphone on and check sound level and adjust the | # Turn microphone on and check sound level and adjust the TRIM, INPUT LEVEL and MASTER as necessary. For voices bring low EQ down more than high EQ. | ||
To connect music from iPad, or music source | To connect music from iPad, or music source | ||
# Follow all of the instructions above to set up the sound system. | # Follow all of the instructions above to set up the sound system. | ||
# Connect the device to Aux in. | # Connect the device to Aux in - #6 Aux to PGM (below) with a 1/8" to RCA adapter cable. | ||
# Adjust the sound level by rotating the Aux In PGM knob (center of board, white tape "DJ") clockwise to desired level. Make sure to have the volume on the device all the way up. | # Adjust the sound level by rotating the Aux In PGM knob (center of board, white tape "DJ") clockwise to desired level. Make sure to have the volume on the device all the way up. | ||
When done: | When done: | ||
# Make sure the Aux to PGM channel and/or the Master is turned down before removing any device (microphone, phone, computer, pad) | # ** IMPORTANT ** Make sure the Aux to PGM channel and/or the Master is turned down before removing any device (microphone, phone, computer, pad) | ||
# Turn all levels off before unplugging the mixer | # Turn all levels off before unplugging the mixer (TRIMs, INPUT LEVELs, Aux to PGM & MASTER) | ||
# Put speaker | # Put speaker cables back into locked storage space. | ||
# Move mixer into locked storage and lock the space when done. | # Move mixer into locked storage and lock the space when done. | ||
Latest revision as of 23:31, 30 December 2017
Omni Sound System - Procedure to setup basic sound system
- Get the key to the storage lockup, on the left side of stage when facing the stage.
- Remove the TOA amp/powered mixer, it is heavy so you may want to use a cart.
- Set it on the table outside the storage unit or leave it on the cart, move it to the stage front near the speakers.
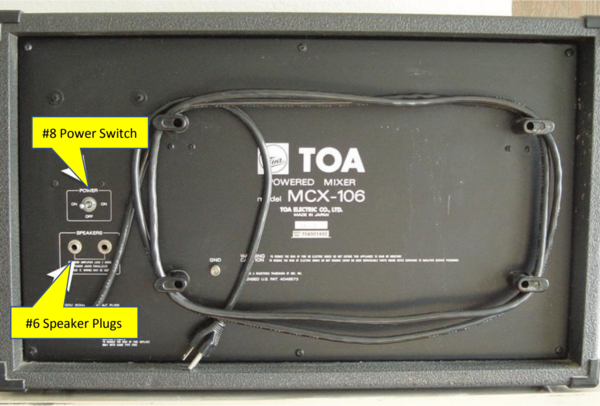
- Make sure the unit is off - #8 Power Switch (below)
- Plug in the unit.
- Connect the speaker cables to the back of the unit - #6 Speaker Plugs (below). Use either port on the speakers. Speakers are usually on the stage. Speaker cables are in the storage lockup.
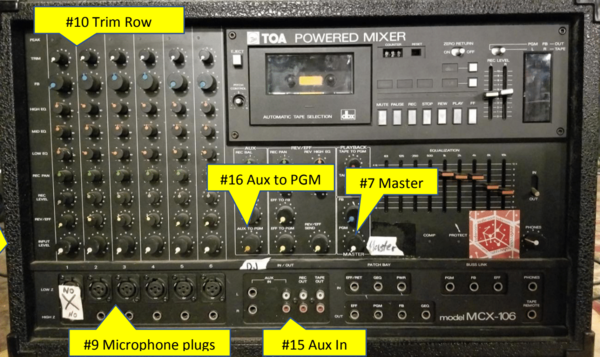
- Make sure that all of the white knobs (TRIM & INPUT LEVEL) and the MASTER are turned down/ fully counter clockwise.
- Turn the unit on, power switch on the back of the unit.
- If using microphones connect them to inputs 2 or 3.
- After connecting a microphone, speak loudly into it & adjust the appropriate TRIM knob (top row of white knobs) clockwise slowly unit the red indicator light flashes (just above the knob), then turn the knob back just a little.
- Adjust the appropriate INPUT LEVEL knob (bottom row of knobs) clockwise about half way up.
- Adjust the MASTER control knob (lower middle with white tape "Master" written on it, clockwise about half way.
- Turn microphone on and check sound level and adjust the TRIM, INPUT LEVEL and MASTER as necessary. For voices bring low EQ down more than high EQ.
To connect music from iPad, or music source
- Follow all of the instructions above to set up the sound system.
- Connect the device to Aux in - #6 Aux to PGM (below) with a 1/8" to RCA adapter cable.
- Adjust the sound level by rotating the Aux In PGM knob (center of board, white tape "DJ") clockwise to desired level. Make sure to have the volume on the device all the way up.
When done:
- ** IMPORTANT ** Make sure the Aux to PGM channel and/or the Master is turned down before removing any device (microphone, phone, computer, pad)
- Turn all levels off before unplugging the mixer (TRIMs, INPUT LEVELs, Aux to PGM & MASTER)
- Put speaker cables back into locked storage space.
- Move mixer into locked storage and lock the space when done.
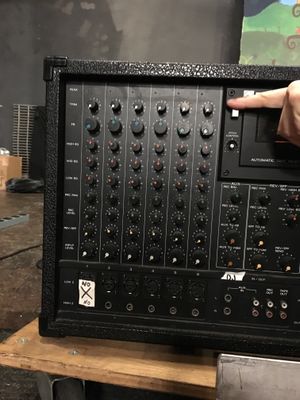
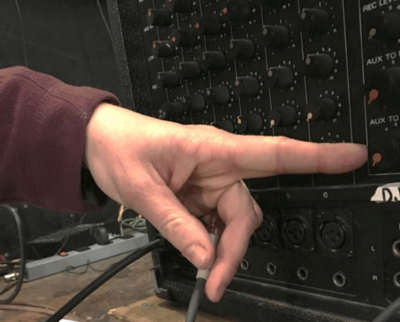
Trim Row is here:
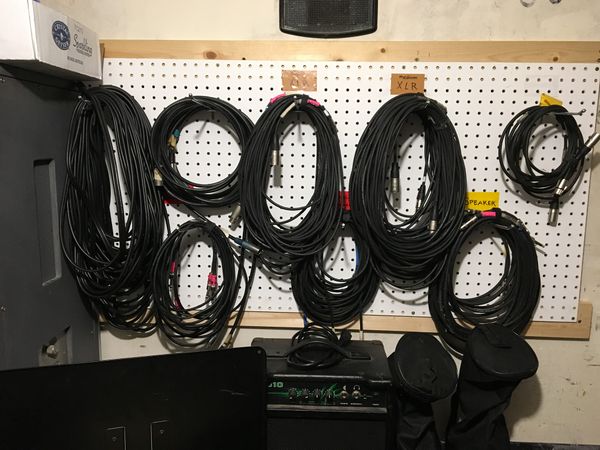
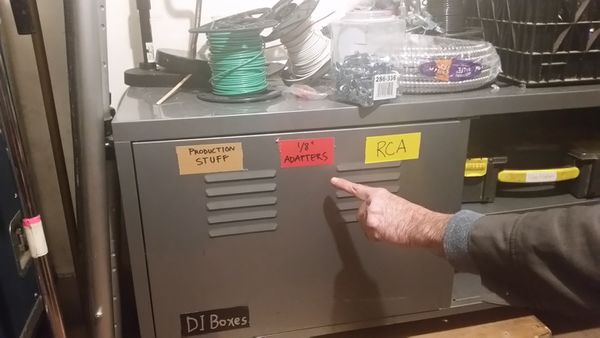
Microphone and speaker cables are on the wall in the storage lockup.
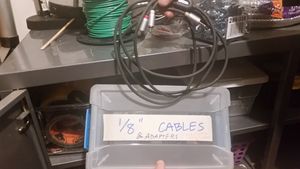
Adapters for laptops are in this box in the storage area:
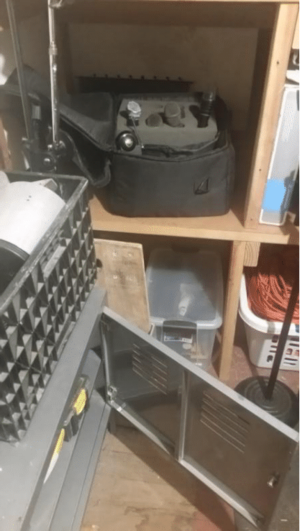
Microphones are here:
Do not unplug any device unless Aux to PGM volume is down:
Manual: http://www.toaelectronics.com/media/MCX-106.pdf
How to roll up cables: https://www.youtube.com/watch?v=XhgdIxsHypo
